5 Mistakes to avoid when taking live video production to the cloud

Going to the cloud offers compelling gains, but is not without considerable risk

Live production in the cloud offers compelling gains, like flexible, fast scalability and reduced carbon footprint. But it’s a move that is not without risks. Find out how to minimize the risks and successfully make the switch so that you can be among the broadcasters getting great ideas to market faster.

In today’s dynamic work environment, businesses face significant challenges in maintaining effective communication and meaningful engagement with their employees. Our latest research dives into these challenges and offers insights to improve your employee engagement strategy.

In this 4-page report, you’ll discover:

  • Why cost expectations are often wrong – and how you can get a better ROI than you think (42% less IT costs per user)
  • How to create more engaging content with NDI-native live production tools
  • 5 security considerations that many companies don’t consider until it’s too late
  • How to produce using a hybrid model of on-site and cloud deployment
  • Why latency no longer has to be a showstopper – even with 4K switching

Cloud production promises reduced costs, greater flexibility, faster turnaround, and on-demand capacity. By adopting NDI native and cloud-ready solutions, content producers can streamline workflows with a more IP-driven, software-focused approach. However, unlocking its potential requires careful planning—get it wrong, and the dream can turn into a costly nightmare.

Download our eBook 5 Mistakes to Avoid When Taking Live Video Production to the Cloud, to discover key insights and avoid common pitfalls. Ensure a smooth, efficient transition to cloud-based production and optimize your workflows with expert tips.

Don’t worry, this section is already hidden =)

Don’t forget to include:
  • 1. Document Overview list view is handy to have open so you can see labeled areas indicating where some edits can be made
  • 2. Slug is the URL. Once you save a draft with a page title, it defaults to that unless you edit it. Editing the slug URL to be more concise is a benefit at times.
  • 3. Meta Description is an SEO-friendly description.
  • 4. Keyphrase Synonyms is where the bulk of your keywords will go. Separate each keyword or phrase with a comma. These are all supporting keywords to the Main Keyphrase (see item #7).
  • 5. Featured image: This is part of the meta-data and auto-populates any query card image on hub pages. Page Titles and Subheadings are also elements needed to populate query cards and metadata.
  • 6. Excerpt This auto-populates on query card text. If left empty, it will default to the first bit of text on the page. This can be the same as the Meta description.
  • 7. Focus Keyphrase is the main Keyword. The inputs for this and the supporting keywords are in slightly separate areas, making it a little confusing.
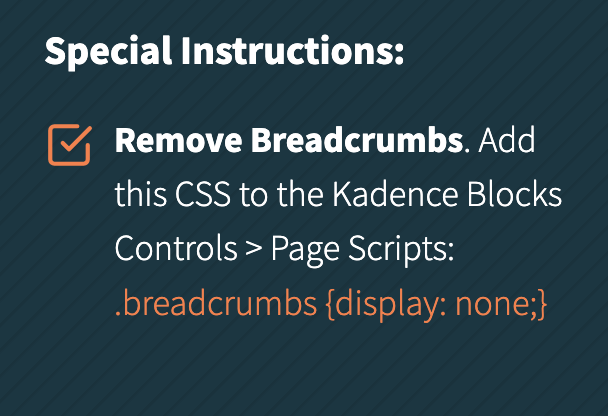
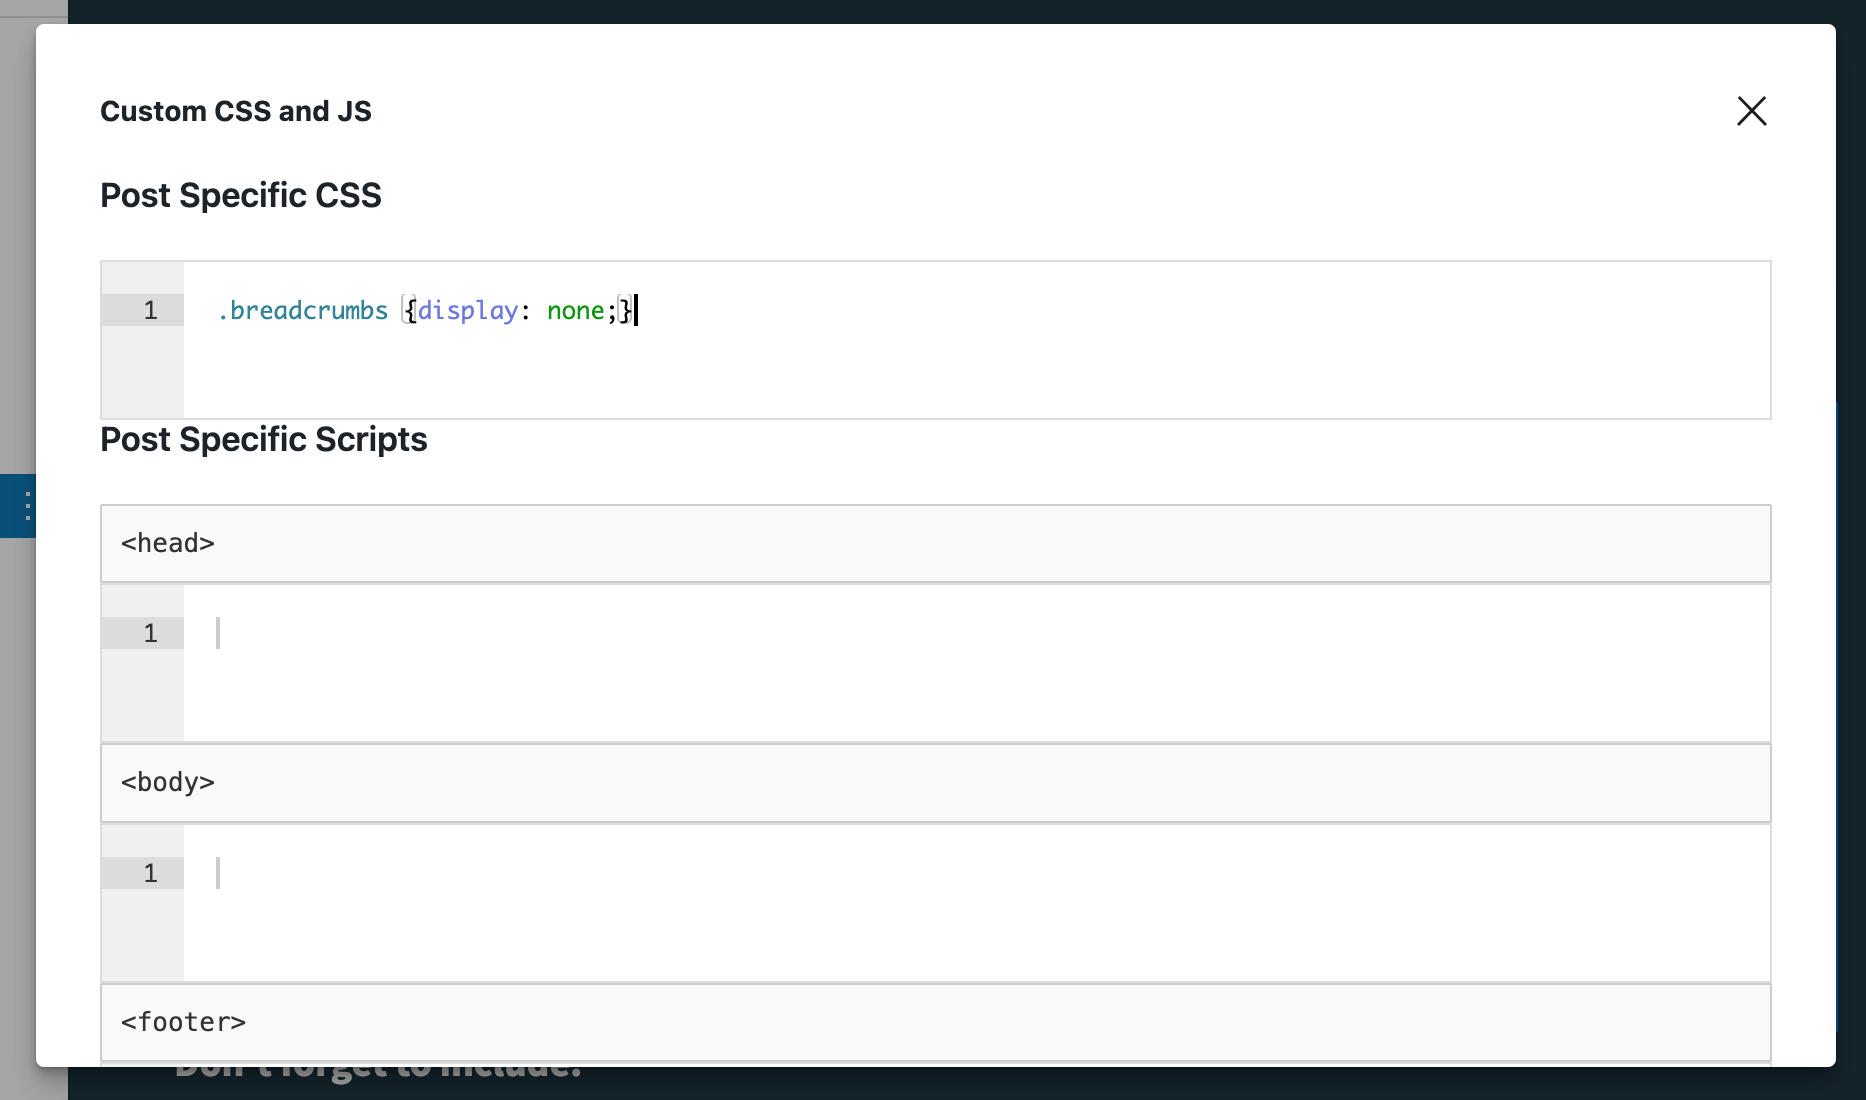
Special Instructions:
  • Don’t forget any Pardot form or ebook links needed for buttons and other links.
  • Make sure all items are turned on below page content:
    • Do Not Display Title
    • Do Not Display the Featured Image
    • Do Not Display Subtitle
    Starter templates: hide title, subtitles, and featured image
  • Remove Breadcrumbs. You are NOT expected to do this, but it does need to be done which is why it is always good to tag a web team member in Pardot to review a page prior to publishing. However, if you are an experienced user, there are instructions below. Add this CSS to the Kadence Blocks Controls > Page Scripts. See the Instruction gallery images below.
    .breadcrumbs {display: none;}